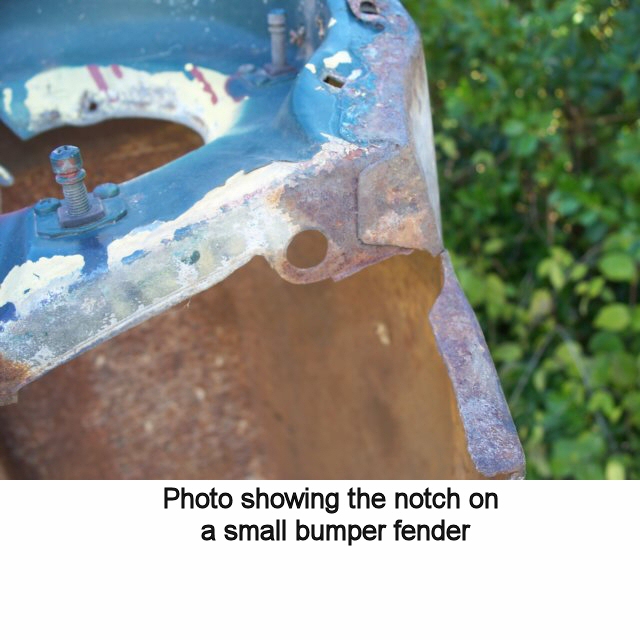
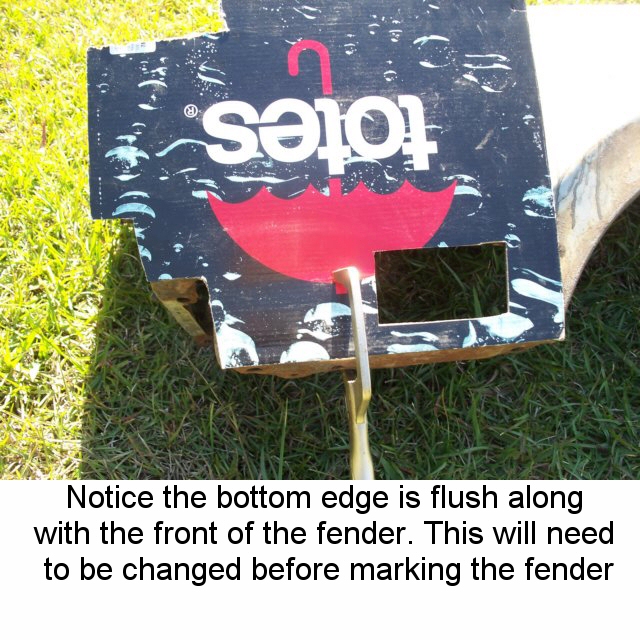
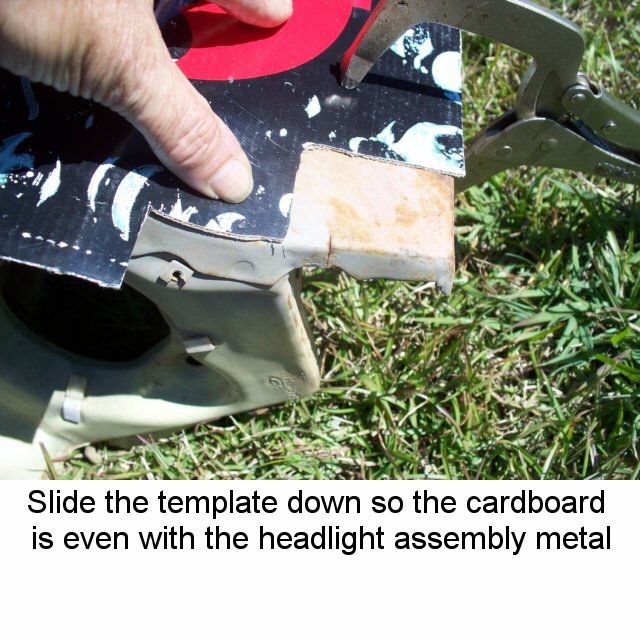
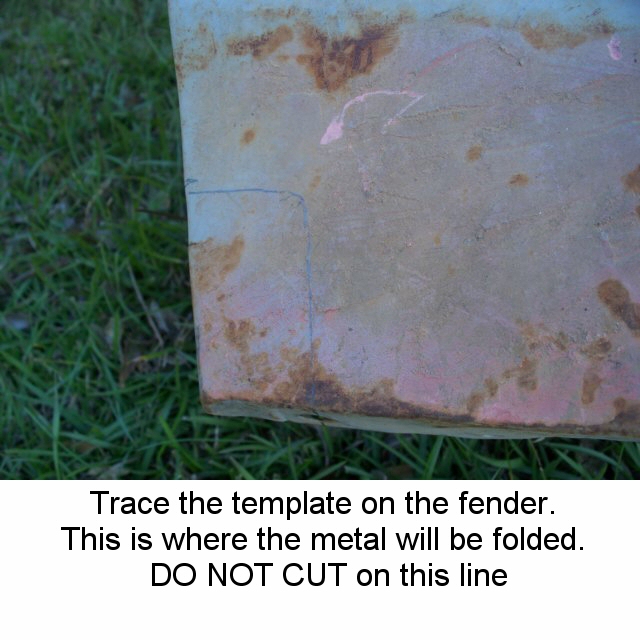
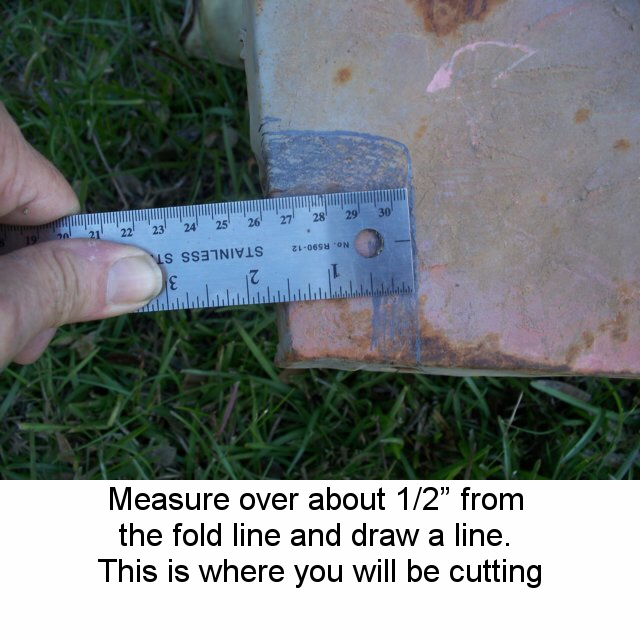
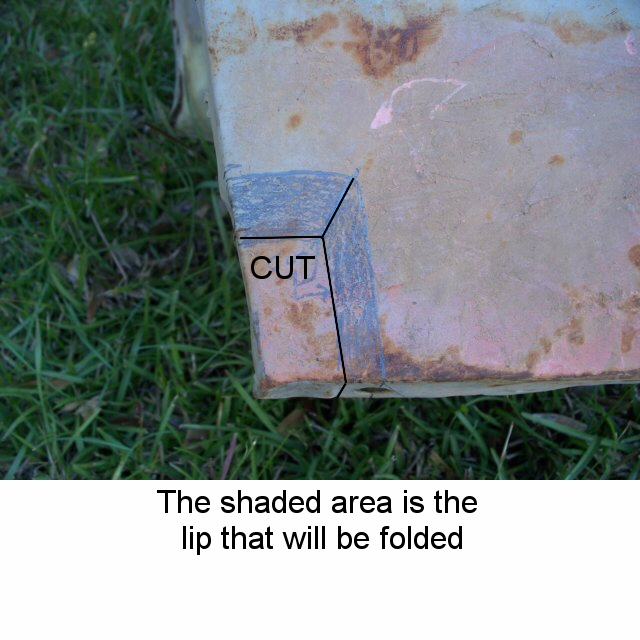
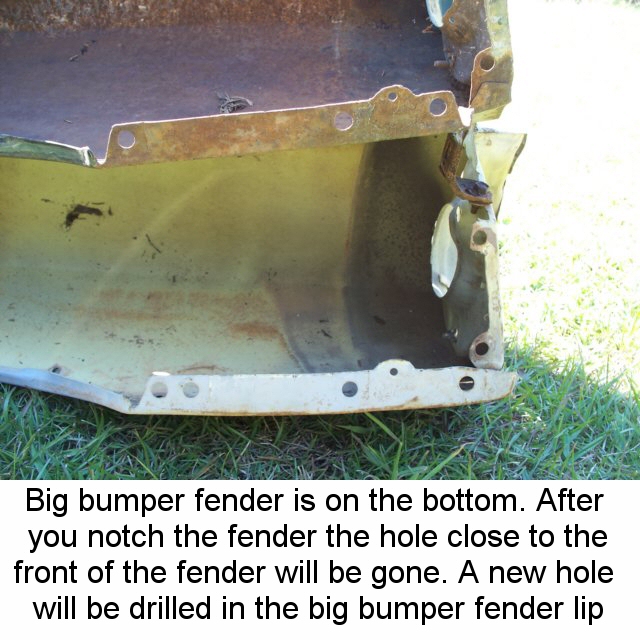
Fender Notch
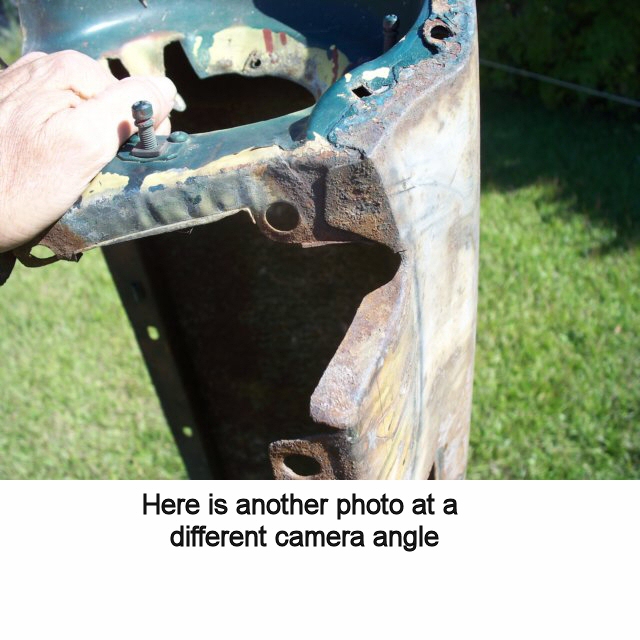
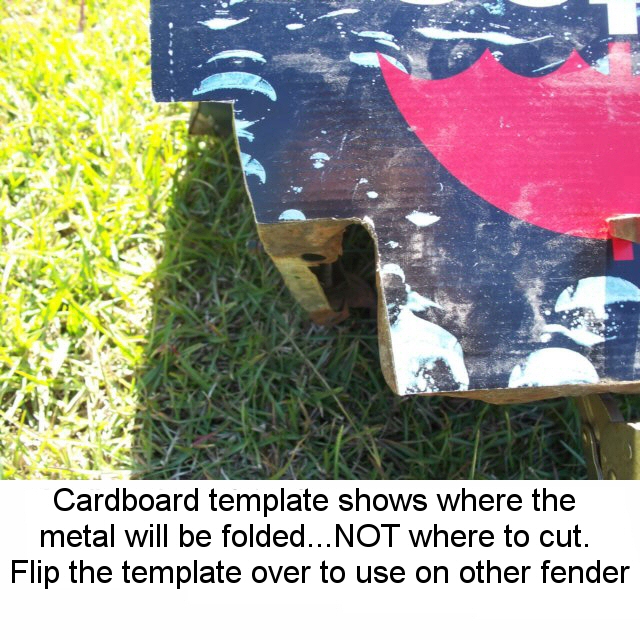
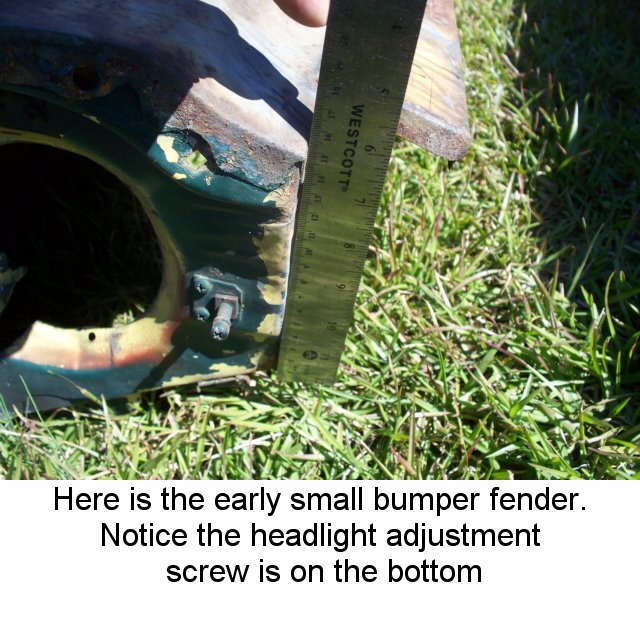
The photos below show how I notched a big bumper fender and converted it to a small bumper fender. I had an early fender to trace out a cardbord template from a shoebox.
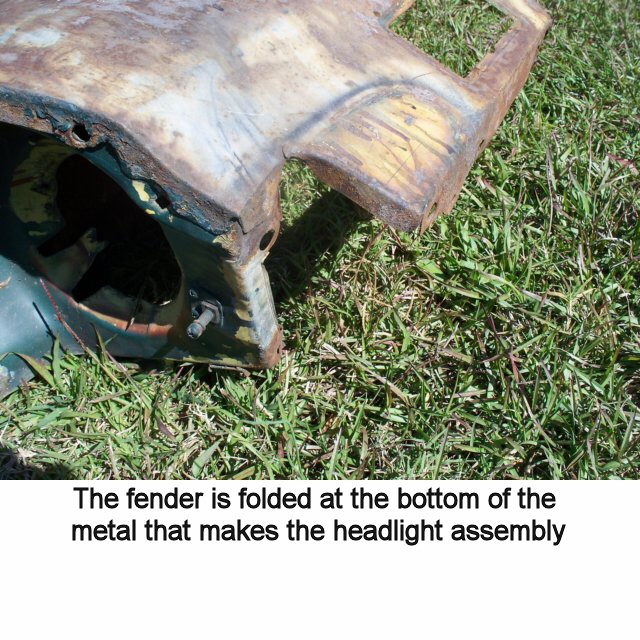
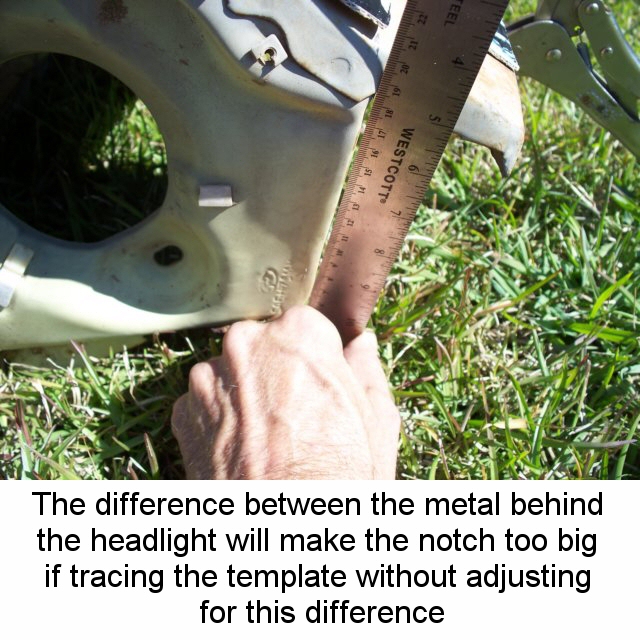
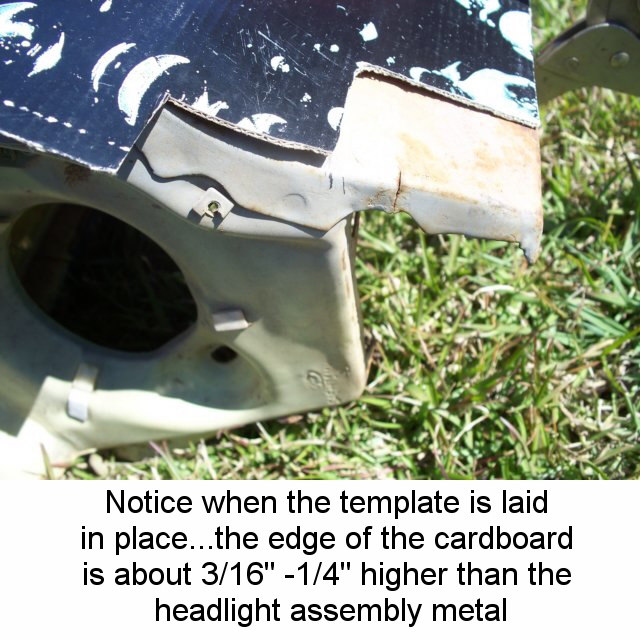
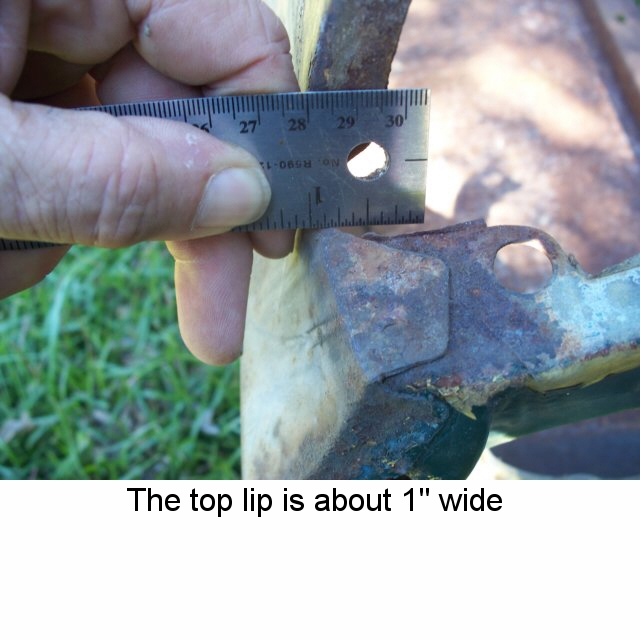
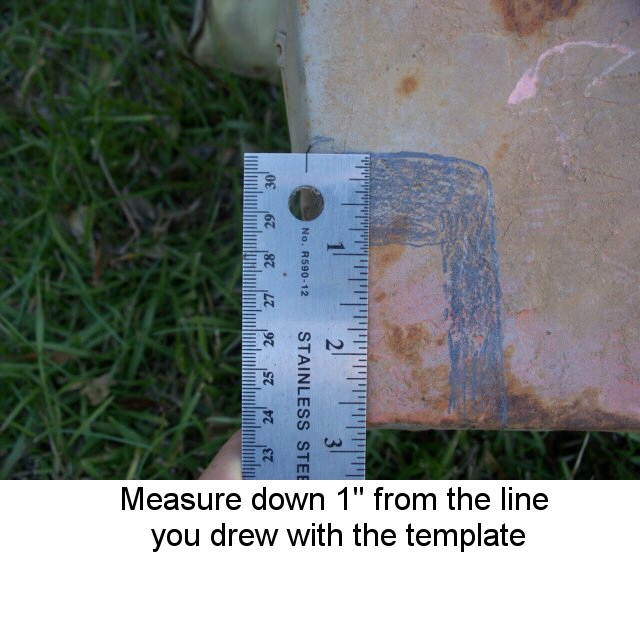
Warning...The sheet metal behind the head light bucket is different on a big bumper fender. If you notch the fender by measuring a small bumper fender you will end up with a 3/16 in.-1/4 in. gap between the fender and stone guard.